
 Ok, after several days of trial and error, a lot of paper, and not so much ink. Which by the way surprised me, I am impressed with how many images you can print with out using up a lot of ink. I finally got the prints coming out of the printer matching the image on my monitor.
- Here are the steps:
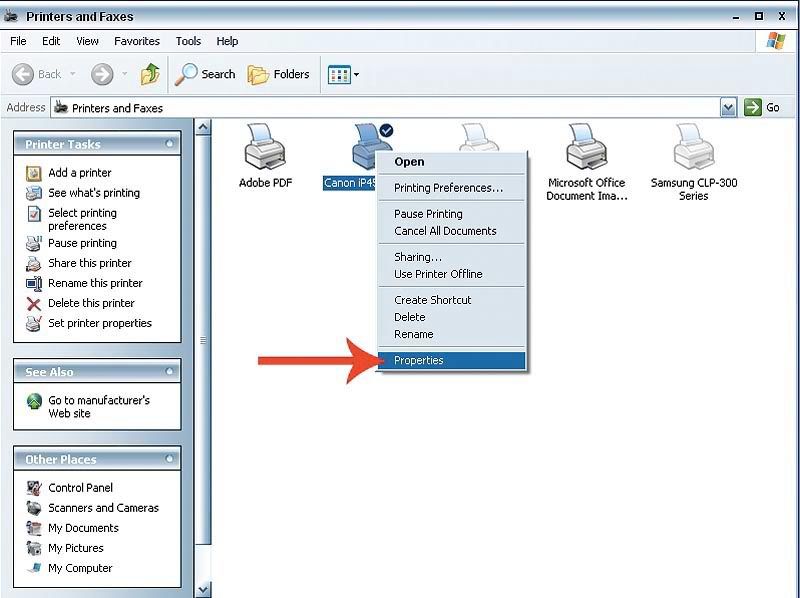
Calibrate your monitor! -If you do not know how to do this or have never done this, do it. If you don't know how: you can view a tutorial here. - Then you need to set the profile for the printer: Go to your printer and faxes dialog box, either through your control panel or from the start button. Right click on the Canon icon and go to properties at the bottom of the drop down list.
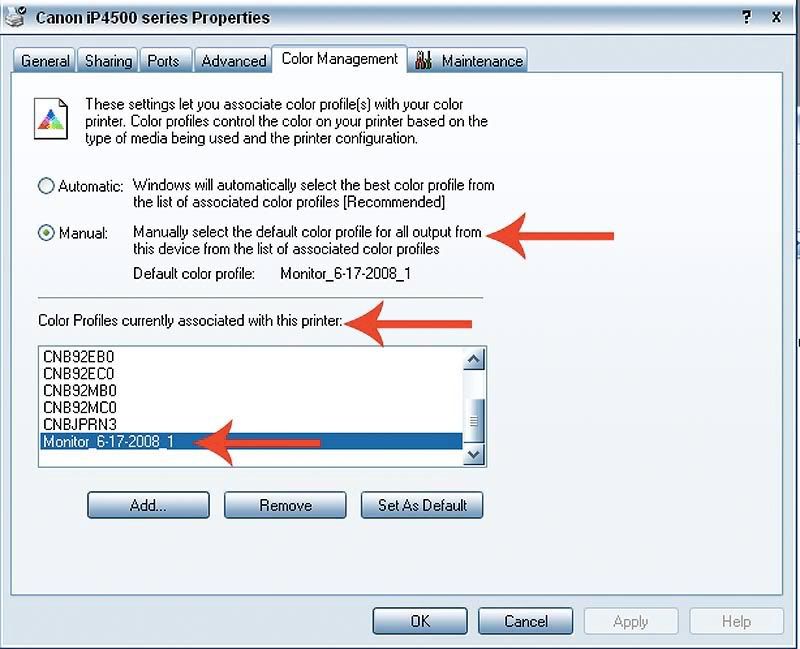
- Once in the properties dialog box, go to the Color Management Tab at the top. Change the color settings from Automatic to Manual. Then set the color profile to the profile you saved when you calibrated your monitor. Set it as the default. Apply and you are done with this part.
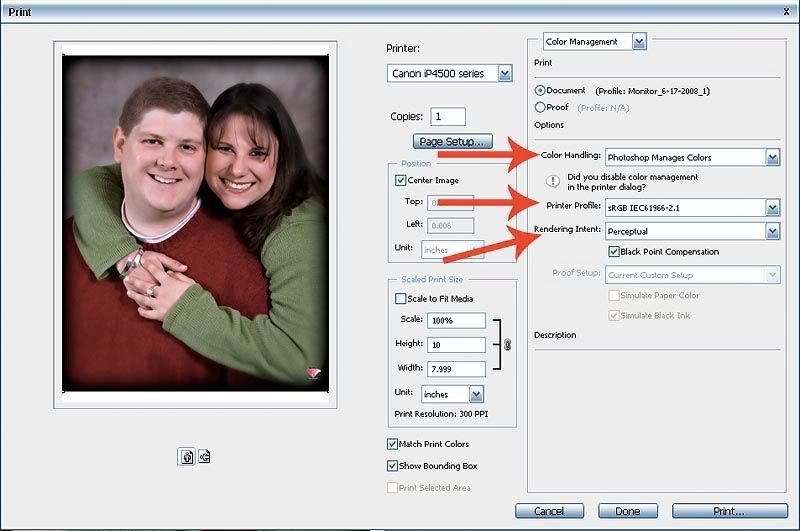
- Then when you are ready to print from Photoshop, go to file, print and when the print dialog box opens select the Canon iP4500 from the printer drop down list and then go to the page setup button. Set the media type, I left the print quality on standard and the image that was printed was pristine and sharp, so using high quality is just a waste of ink (In my opinion), and leave the Color/Intensity on Auto.
- Finally when you go back to the printer dialog box: Under color management, set Color Handling to Photoshop manages color, set the Printer profile to sRGB - because Ink Jet printers are actually set to that value like the web, and set Rendering intent to Perceptual so that the colors will blend better.

I had stated in my previous post about this printer that it prints full color 8x10's in 20 seconds. That is actually not true. It does a full color 8x10 in about 24-28 seconds. It will do a 5x7 picture package (a 5x7 and 4 wallets), (2 5x7's), (8 wallets) in about 20-25 seconds.
No comments:
Post a Comment